Step 1: Complete the Google Workspace (G Suite) account setup wizard
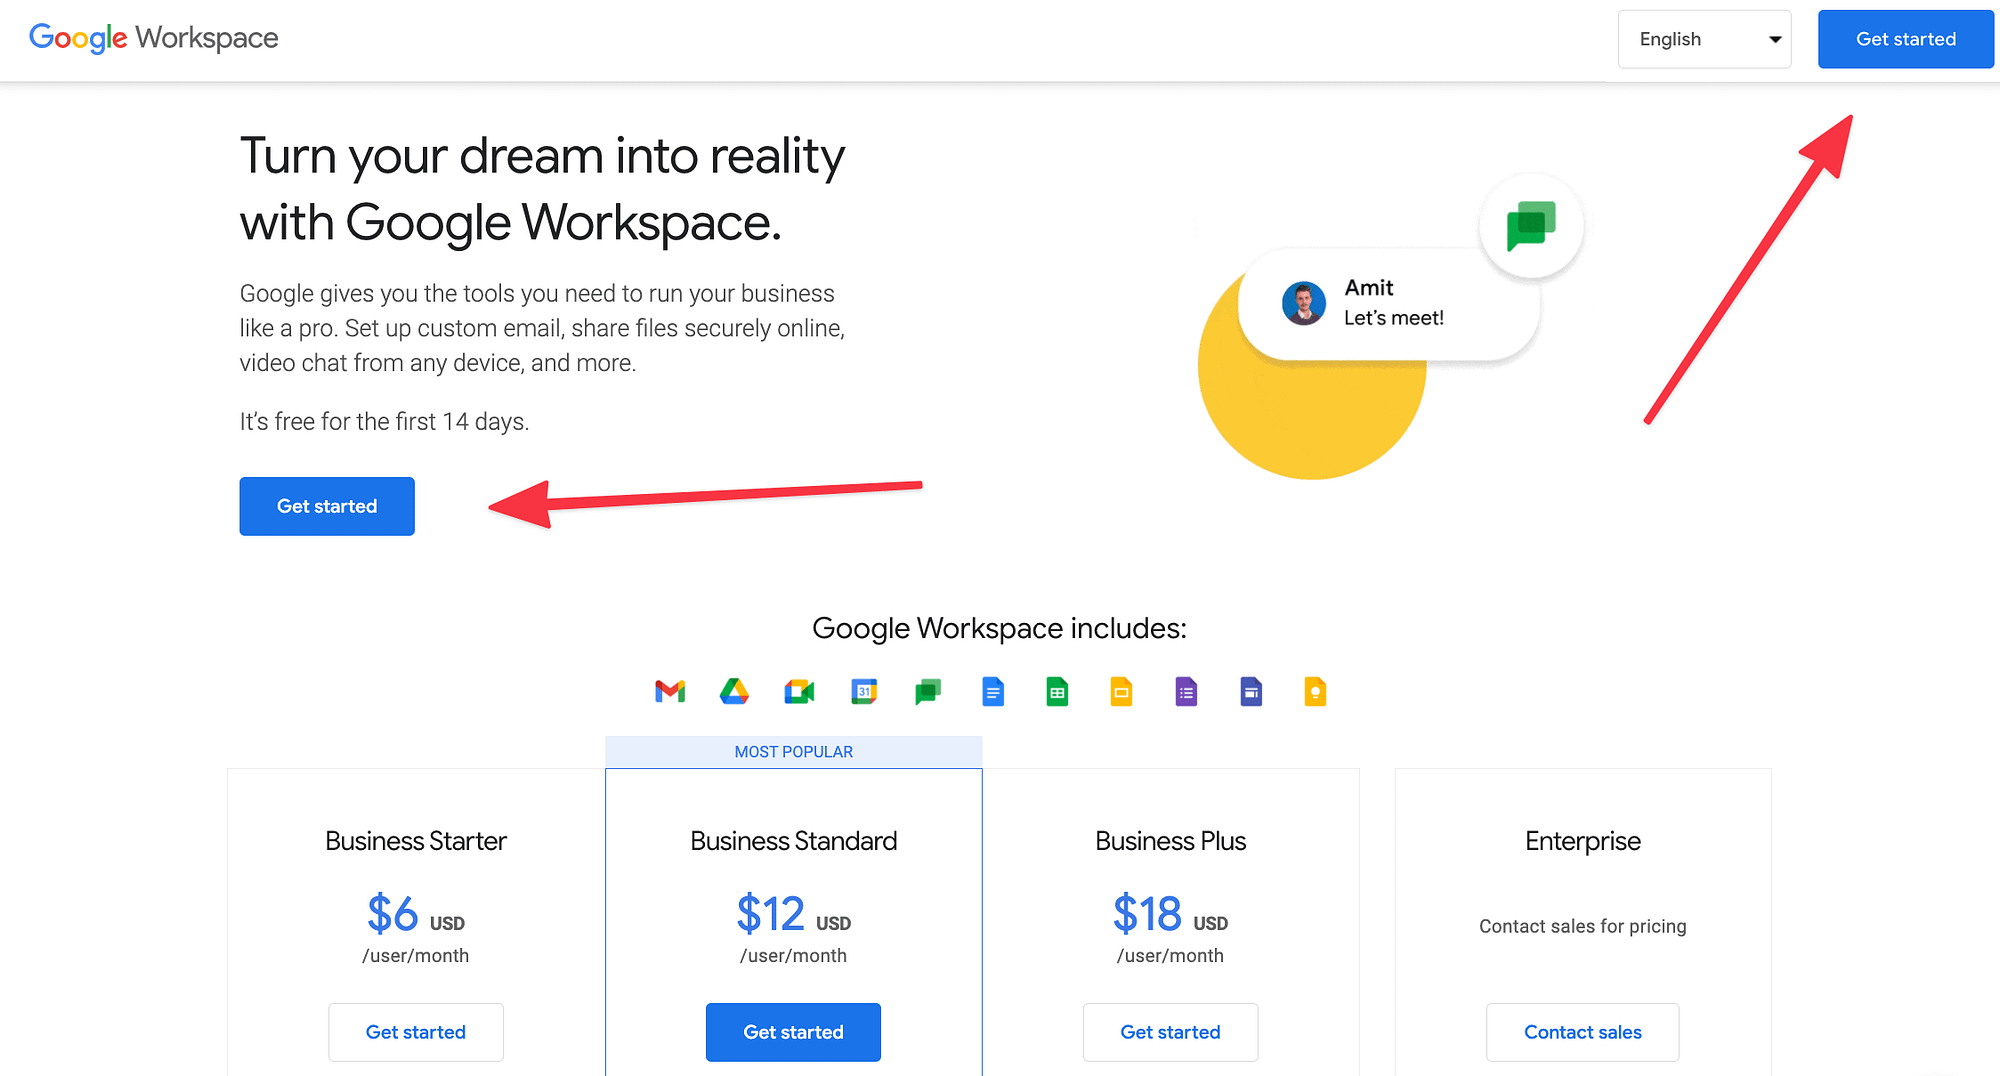
To get started, you’ll need to create your own Google Workspace account.
To do that, head here and click the big Get Started button.
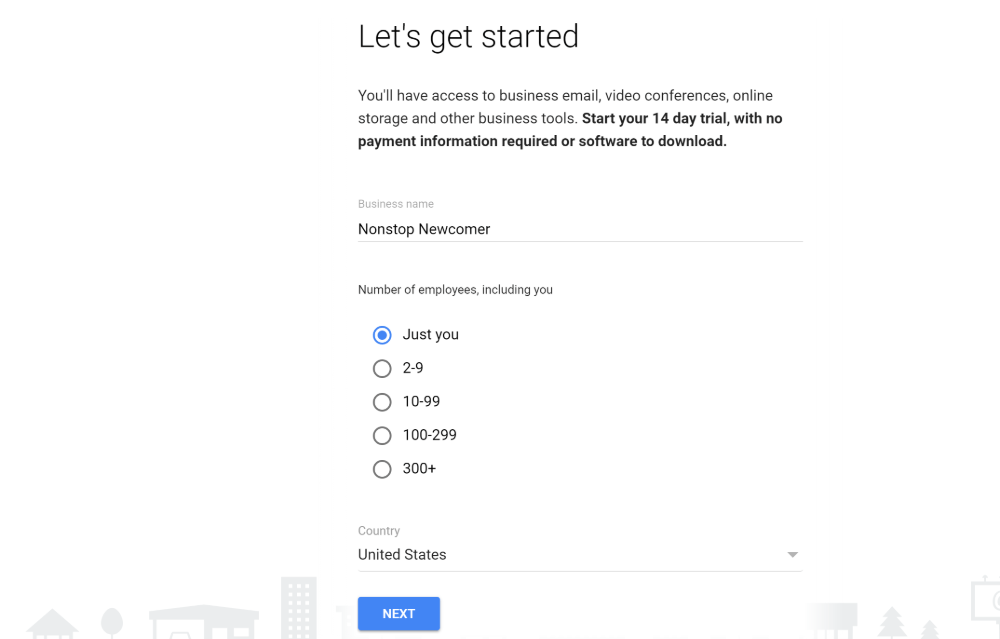
This will launch the account setup wizard, which will prompt you to provide Google with some information.
First, enter some basic information about your account. Then, click Next:
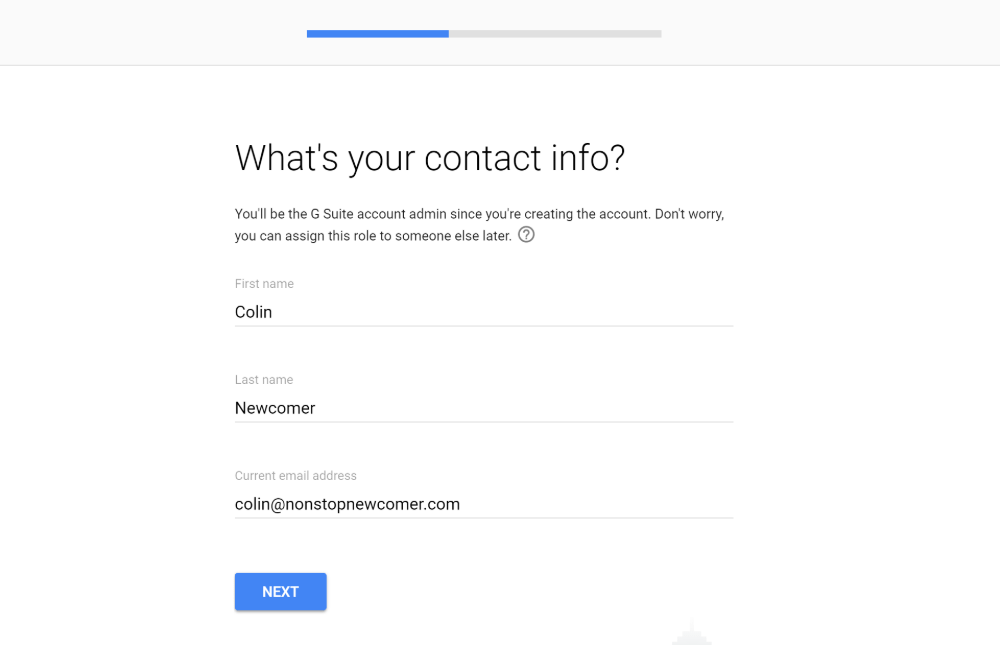
On the next screen, you’ll need to enter the information for your Google Workspace admin account.
If you’ve already set up email through your domain host, you use that email in the Current email address box. Otherwise, you can enter a personal email address:
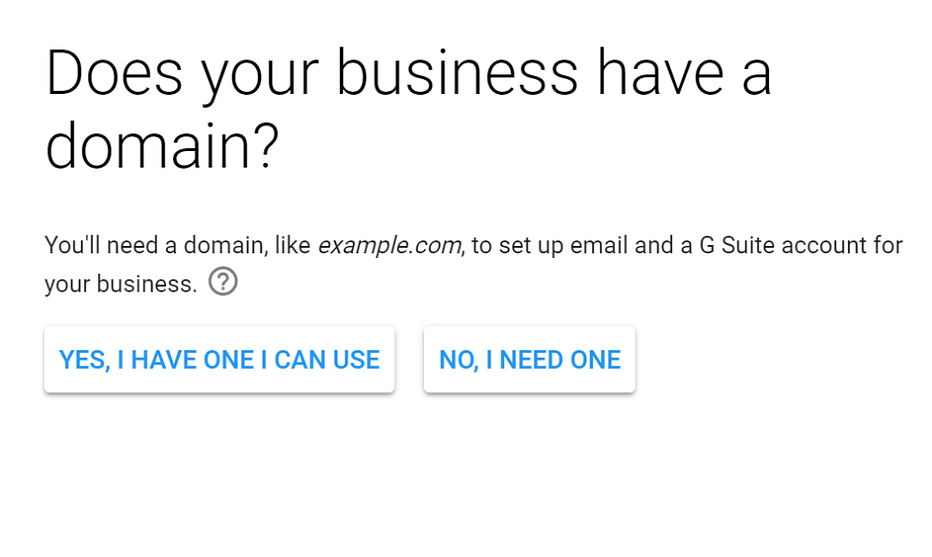
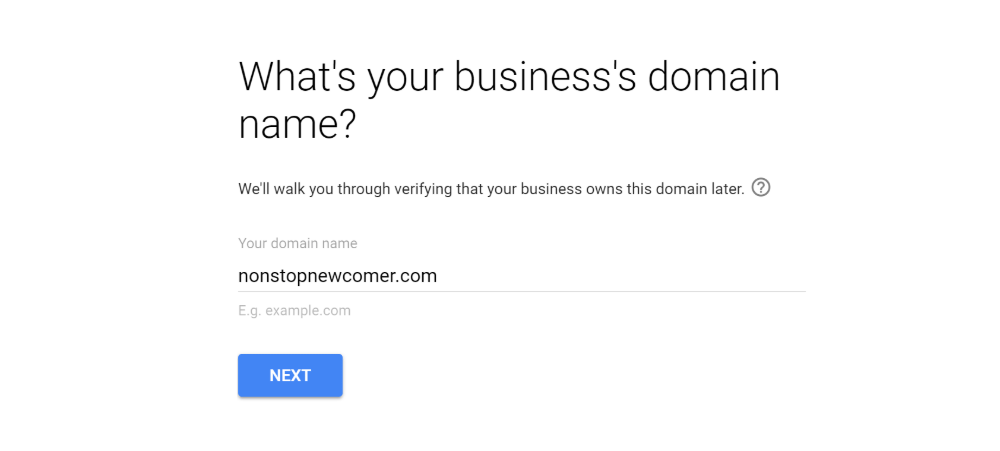
Next, indicate whether your business already has a domain name, you should choose Yes, I Have One I Can Use:
Then, enter your existing domain name in the box and click Next:
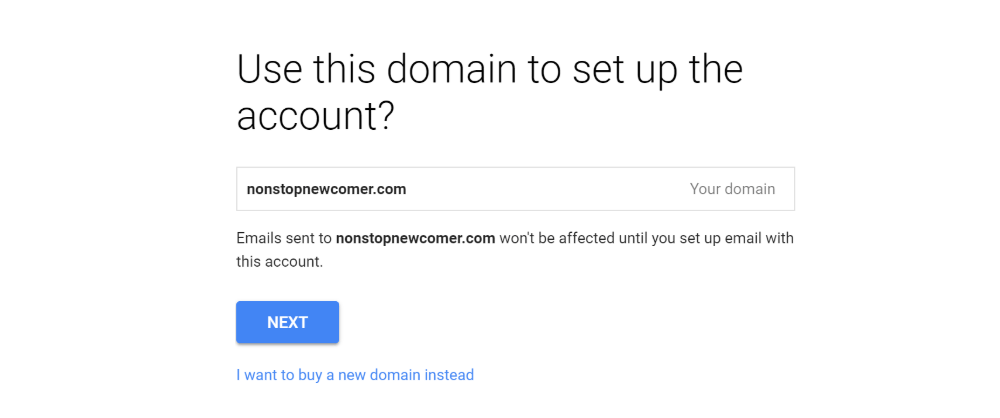
Then, click Next again to confirm that you want to use that domain name:
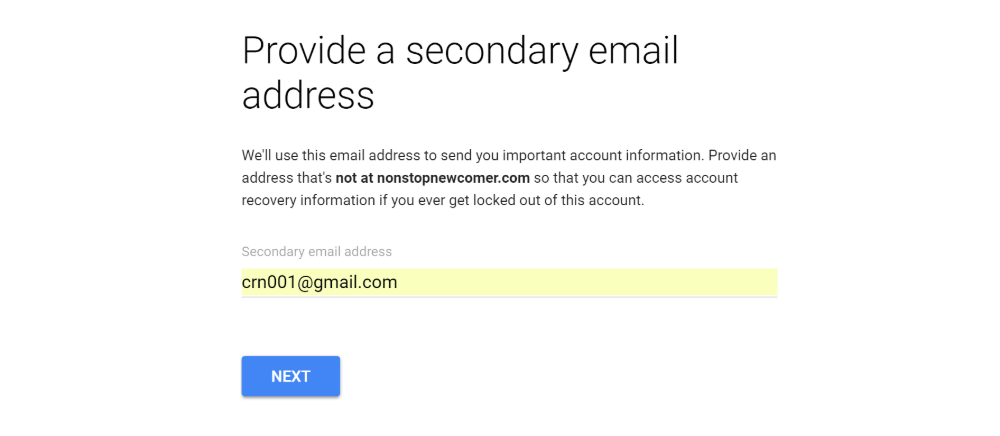
After that, you’ll need to enter a secondary recovery email address, which you’ll use in case you can’t access your primary email address. For example, you could enter your personal Gmail account here, if you have one:
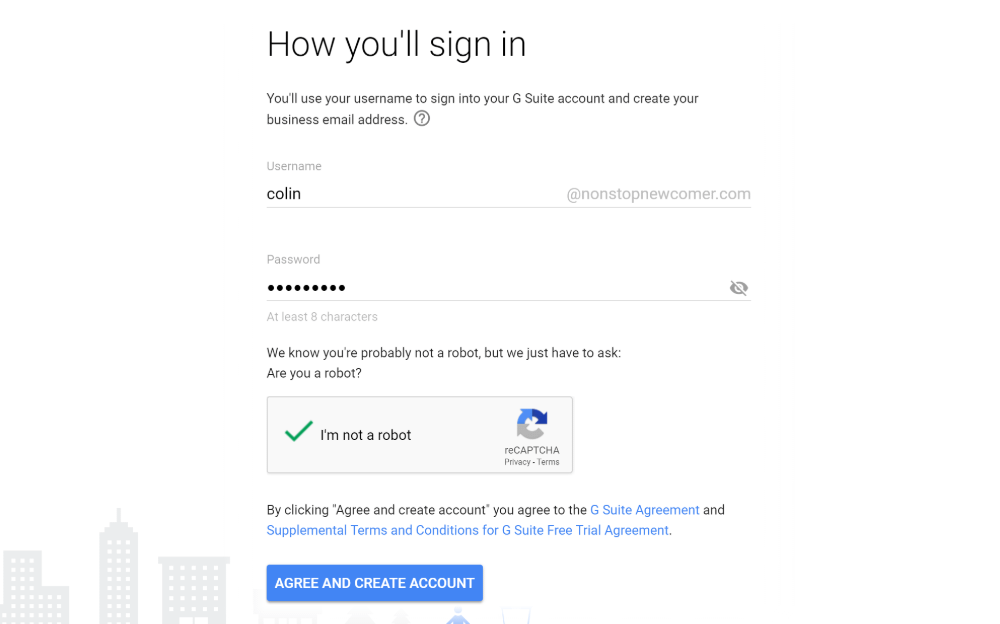
Then, you’ll need to enter a username and password that you’ll use to sign into Google Workspace. Your username will be your business email address by default (i.e., username@yourdomain.com), so you should keep that in mind when choosing which username to use.
Then, click Agree And Create Account to finish the process:
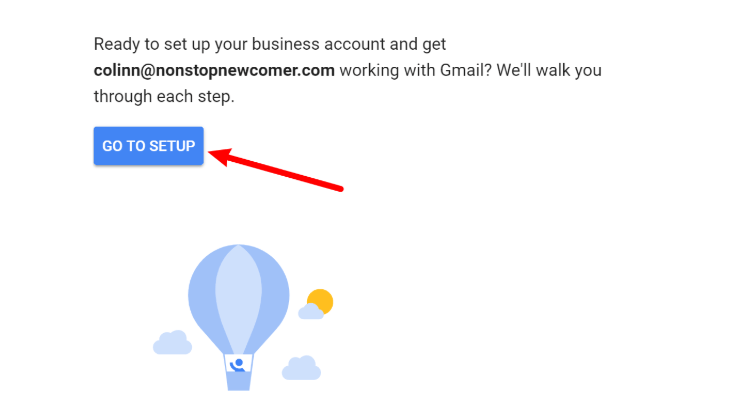
Step 2: Add other people to Google Workspace (optional)
Once you finish the wizard above, you’ll see a confirmation that your account was created, as well as a button to Go To Setup. Go ahead and click that button:
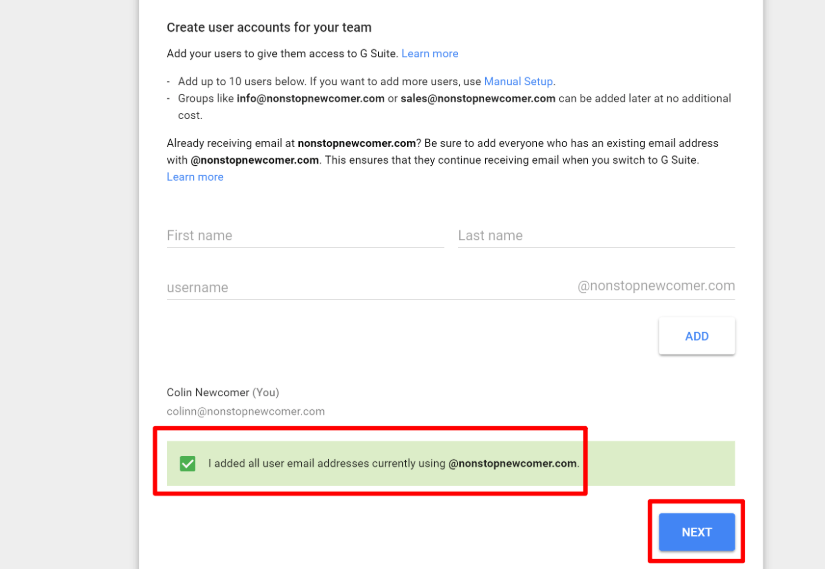
If you want to give other people access to your shared Google Workspace account, click Start next to Add people to your Google Workspace account. Then, you’ll be able to add additional users.
If you’re the only person who will use this Google Workspace account, just check the box I added all user email… and click Next:
Step 3: Verify your domain name with Google
If we have your domain name, please supply us with your username and password for your Google account. We will then activate the domain for you.
Please note: There can be up to 24 hours of disruption when transferring any emails to this service.
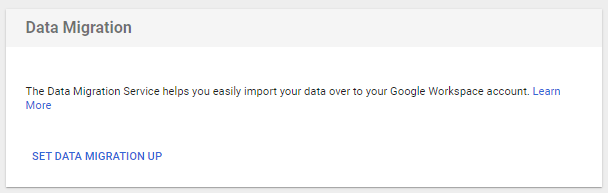
Step 4: Migrate Emails
Once we have completed step 3, you will then want to migrate the mail from your previous email account to your new Google Workspace inbox, please follow the instructions below:
Log in to your Google Workspace Admin Console. Click the Data Migration icon.

Click Set Data Migration Up.
On the next page, fill out the necessary fields. You will be able to get these from your current email provider.
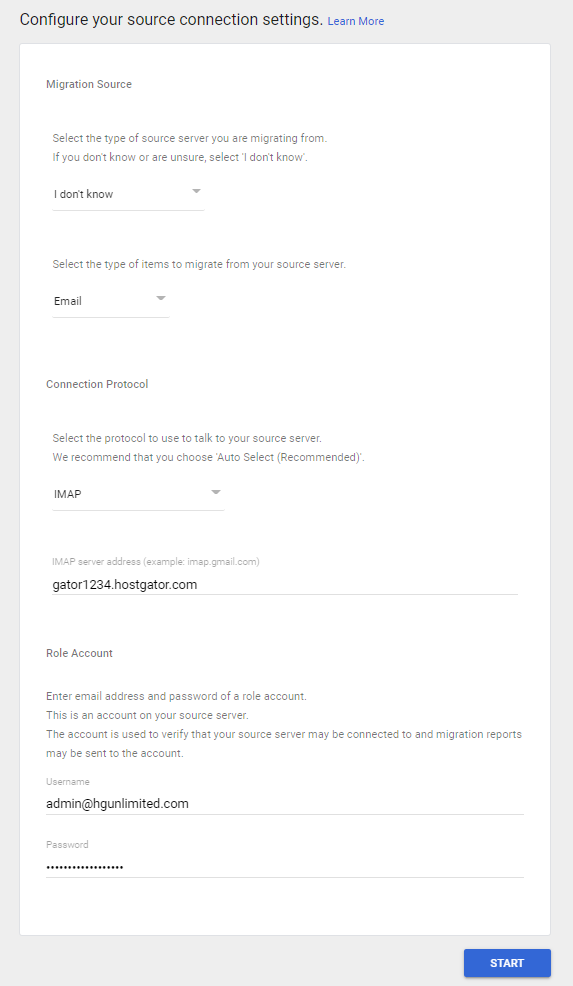
- Select the type of source server you are migrating from – Choose I don't know / Other IMAP Server.
- Select the type of items to migrate from your source server – Choose Email from the dropdown.
- Connection Protocol - Select IMAP from the dropdown.
- IMAP server address - Enter your IMAP Server Address where your email was previously hosted.
Note: If your email was hosted at HostGator, your server name can be found within your Welcome email and Customer Portal.
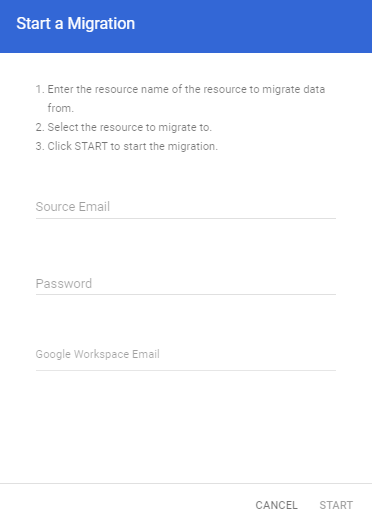
- Role Account - Enter the full email address and password of the account to which you wish to migrate the emails.
Click the Start button to continue.
You will be taken to the next menu if your connection information is correct.
If unsuccessful, a prompt will appear on your screen, notifying you of the unsuccessful connection. You will need to ensure that you have the correct server name, full and correct email address, and password.
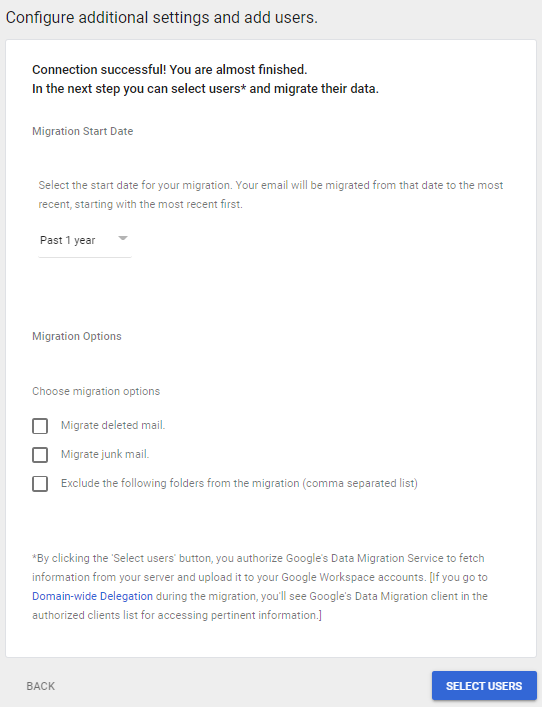
On the next page, choose preferred settings, then click Select Users to continue.
Place a checkmark next to the users you have entered the settings for, then click the arrow button to begin the migration.
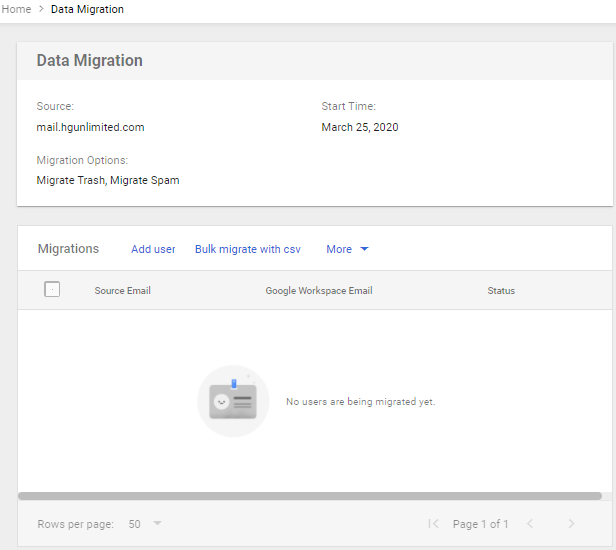
If no user is available, click Add User to create a new user. Then, click Start to proceed.
Refresh the page after a few minutes to check if the migration was successful.

